
Crafts and Gifts
Craft Stampers: Exploring the Different Stampers for DIY Projects
Nov
Craft Stampers: Exploring the World of Rubber Stamps and Clear Stamps
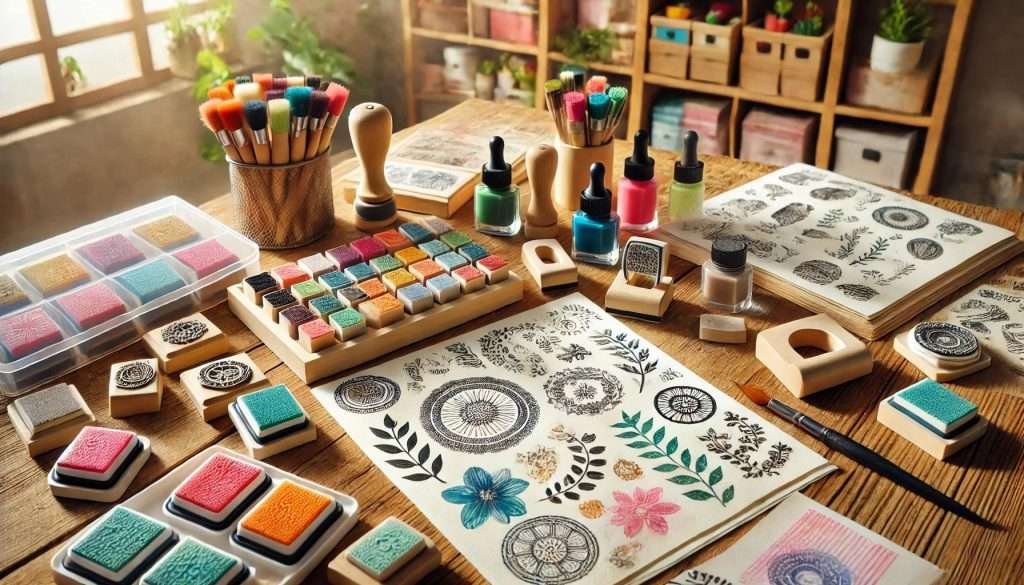
Stamping is a versatile and creative way to add unique touches to your DIY projects. Whether you’re an experienced crafter or a beginner, understanding the differences between rubber stamps and clear stamps, the types of ink pads there are, and the best materials to use can elevate your crafting game. Let’s take a look at the world of DIY Craft Stampers and stamping and discover some exciting ideas for your next project!
Rubber Stampers vs. Clear Stampers: What’s the Difference?
- Rubber Stamps: Traditionally made from red or grey rubber, these rubber stamps are durable and often come mounted on a wooden or acrylic block. They’re ideal for detailed designs and can be used on a variety of surfaces.
- Clear Stamps: Made from a transparent photopolymer or acrylic material, clear stamps are flexible and need to be mounted on a clear acrylic block. Their see-through nature allows for precise placement, making them perfect for intricate and detailed patterns and layering. Use the flat glass surface of a drinking glass if you don’t have an acrylic block handy. However it is preferable to use a clear acrylic applicator block.
Ink Pads: Does the Type Matter?
Absolutely. The type of ink pad you choose can greatly affect your stamping results. Here’s a quick guide:
- Dye Ink Pads: Quick-drying and vibrant, dye inks are water-based and work well on paper. They’re ideal for everyday stamping and layering.
- Pigment Ink Pads: Slower to dry but rich in colour, pigment inks sit on top of the paper rather than soaking in, making them perfect for embossing and stamping on darker surfaces.
- Solvent Ink Pads: These inks are permanent and waterproof, making them suitable for non-porous surfaces like glass, plastic, and metal. They’re great for mixed media projects.
- Chalk Ink Pads: Offering a matte, chalky finish, chalk inks work well on paper, fabric, and wood. They’re a favourite for vintage and rustic-themed projects.
How to Use and Clean Your Craft Stampers
- Using Stamps: Simply ink your stamp by gently pressing it onto the ink pad. Make sure the ink is evenly distributed. Then, press the stamp onto your chosen surface with even pressure. Lift carefully to avoid smudging. These pads are good for either of the rubber or clear stamps. If using clear stamps, you can take the pigment stamp pad and apply it to the stamp. Whatever you prefer. You can also use certain washable markers to ink your clear stamps.
- Cleaning Stamps: After each use, clean your stamps to maintain their longevity. For most inks, soap and water or a baby wipe will do the trick. If you’re using solvent ink, consider a specialized stamp cleaner.
DIY Stamping Ideas and Projects using your DIY Craft Stampers
Stamps can be used in countless ways! Here are some creative ideas:
- Cards & Scrapbooking: Stamps add personalized touches to cards and scrapbook pages. Use clear stamps for layering or rubber stamps for bold designs.
- Home Décor: Create custom wall art by stamping on canvas or wood. For a more textured look, try using chalk or acrylic paint as your base.
- Fabric Projects: Use fabric ink or fabric washable markers to stamp on t-shirts, tote bags, or pillows. Permanent markers can also be used but test on a small area first. place card board inside the t-shirt, bags or pillowcases or covers before stamping.
- Decoupage & Collage: Incorporate stamped designs into collage or decoupage projects. Stamp directly onto your material or on paper to create cutouts to affix to a canvas, picture or whatever project you prefer..
Markers vs. Ink Pads: Which is Better?
- Washable Markers: These can be used on clear stamps for temporary designs, perfect for kids’ projects or fabrics you might wash. The colours may not be as vibrant as ink pads, but they offer flexibility. If you’re looking for a lasting design, use an ink pad or a permanent marker.
- Permanent Markers: Use these for a more lasting impression, especially on non-porous surfaces like glass or plastic. They work well with rubber stamps but require quick and careful application. The ink dries fast.
Stamping on Different Surfaces
- Canvas: Paint your canvas with chalk or acrylic paint before stamping. Chalk paint gives a soft, matte finish, while acrylic paint offers a more vibrant, glossy look.
- Wood: Raw or painted wood surfaces can be stamped for rustic or modern décor. Pigment or solvent inks work best here. Prime the raw wood first with chalk paint or acrylic paint. Let it dry and then stamp away.
- Fabric: For fabric, use fabric ink pads or permanent markers. Pre-wash the fabric to remove sizing, and heat-set the ink with an iron for durability.
Real Leaf Stamping
Leaf Stamping for Kids
If you don’t have any real leaves, use a clear stamp or a rubber stamp.
Collage and Decoupage with Stamping
Incorporate stamps into your collage and decoupage projects for added texture and interest. Whether you’re using them as a focal point or background, stamping brings a handmade touch to any project.
Unique DIY Craft Stampers for Stamping Projects: Trays, Terracotta Pots, and Jewellery
Stamping isn’t just for paper or fabric – think outside the box with these creative stamping ideas!
Stamping Trays
Decorative trays are a wonderful canvas for stamping. Here’s how you can create a stunning, personalized tray:
- Materials Needed: Wooden or metal tray, chalk or acrylic paint, solvent ink or paint for stamping, and a protective sealant.
- Steps:
- Prep the Tray: Start by painting your tray with a base coat of chalk or acrylic paint. Let it dry completely.
- Stamp the Design: Use rubber or clear stamps with a suitable ink, whether it is a solvent ink or another ink suitable ink pad you may have; otherwise use paint applied directly to the stamp. Gently press your stamp onto the tray, ensuring even pressure.
- Use an acrylic paint marker or acrylic paint to colour in the design.
- Seal the Design: Once the ink or paint has dried, apply a clear sealant like Mod Podge or another suitable sealant to protect your design from wear and tear.
Tip: In a well ventilated area, you could use a Mod Podge spray sealant or another suitable spray sealant.
Stamping Terracotta Pots
Add charm to your garden with stamped terracotta pots. This project is perfect for both indoor and outdoor plants.
- Materials Needed: Terracotta pots, acrylic paint or chalk paint, permanent markers or solvent ink, a protective sealant.
- Steps:
- Paint the Pot: Apply a coat of acrylic or chalk paint to your pot with a paint brush or a sponge and let it dry. You could use a spray paint in a well ventilated area if you prefer.
- Stamp the Design: Use stamps with solvent ink or permanent markers to create your design. You can also paint directly onto the stamp for a more artistic look. It is probably easier to use a clear stamp as it is more flexible than a rubber stamp. However, if you use a small rubber stamp design, it would work just as well.
- Seal the Pot: Protect your design from the elements by applying a clear outdoor sealant like Mod Podge Outdoor sealant or another suitable sealant. Your decorated artwork will fare better inside.
Stamping Earrings and Jewelry
Create one-of-a-kind stamped earrings and jewellery pieces that are sure to be noticed.
- Materials Needed: Blank metal, wood, shell, or clay jewellery bases, acrylic paint markers, oil paint markers, permanent markers or ink, small stamps, sealant for jewellery. Mod Podge sealant would work well or another suitable sealant you may have.
- Steps:
- Choose Your Base: Start with blank jewellery pieces such as metal discs, wooden shapes, shells, or clay forms.
- Stamp the Design: Use small, detailed stamps and permanent markers or solvent ink to add designs to your pieces. You can also stamp on polymer clay before baking.
- Finish with a Sealant: Apply a clear jewellery sealant to protect your design and give it a finished look.
Get Creative with your DIY Craft Stampers!
DIY stamping offers endless possibilities. Experiment with different stamps, inks, and surfaces to create something truly unique. Whether you’re crafting for fun or making gifts, stamping is a fantastic way to add a personal touch. The advantage of stamping is that the stamps can be used over and over for years if you look after them properly.
If you need any other craft accessories or DIY ideas, see our Craft Store and our Blogs.
Happy stamping!