
Craft Accessories, Craft Store, kids crafts, Sponges
How to use Sponges for DIY Crafts – Fun, Easy & Creative Ideas for Kids (and Adults!)
Mar
How to use Sponges for DIY Crafts – Fun, Easy & Creative Ideas for Kids (and Adults!)
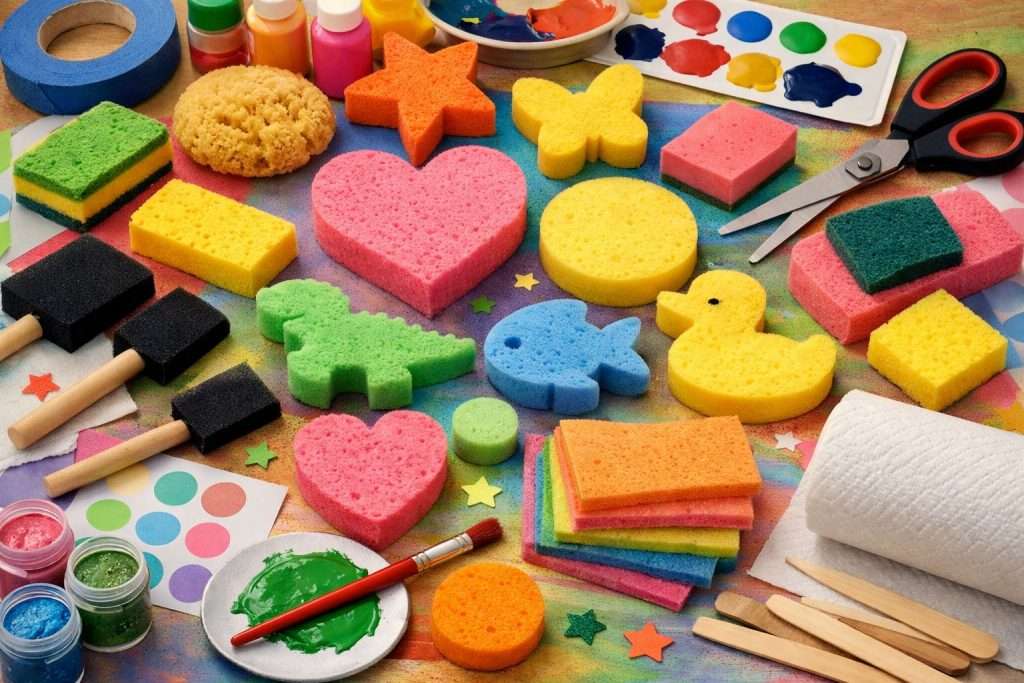
How to use Sponges for DIY Crafts. Are you ready for a fun, affordable, and mess-friendly craft supply? Sponges are one of the most versatile tools you can use for DIY projects! From canvas art to t-shirts, wood signs to mason jars, sponge crafting is perfect for kids, beginners, classrooms, and even seasoned crafters.
Whether you’re using faux sea sponges, kitchen sponges cut into shapes, round sponges, sponge brushes, large round daubers, small stencil daubers, or sponge stampers, the creative possibilities are endless.
Let’s dive into how to use them, what supplies you’ll need, and project ideas!
Why Craft with Sponges?
- ✔ Budget-friendly
- ✔ Easy for kids to grip
- ✔ Less messy than paintbrushes
- ✔ Great for blending & texture
- ✔ Perfect for stamping & stencilling
- ✔ Washable and reusable
Non-DIYers can keep using them in the kitchen… but we prefer them covered in paint 😉
Types of Craft Sponges (And What They’re Best For)
🟡 Faux Sea Sponges
Great for texture effects like clouds, water, marble finishes, and faux finishes on wood or canvas.
- Textured acrylic paintings
- Wall stencilling and faux finishing
- Furniture distressing and refinishing
- Pottery glazing effects
- Scrapbooking backgrounds
- Mixed media art projects
- Decorative canvas art
🟡 Rectangular Kitchen Sponges (Thin Style)
Perfect for cutting into custom shapes:
- Hearts
- Stars
- Letters
- Animals
- Leaves
- Snowflakes
Tip: Cut with sharp scissors and slightly round the edges to prevent harsh paint lines.
🟡 Round Sponges
Ideal for:
- Polka dots
- Flowers
- Background blending
- Bubble effects
🟡 Sponge Brushes
Best for:
- Basecoating wood signs
- Chalk paint application
- Smooth coverage on flat surfaces
🟡 Large Round Sponge Daubers
Great for:
- Stenciling
- Layered backgrounds
- Rainbow blending
- Chalk paint distressing
🟡 Small Yellow Stencil Daubers
Perfect for:
- Fine stencil work
- Tip: How to use Sponge Daubers. Stencilling with a sponge dauber is easy and gives clean, professional-looking results! Pour some paint onto a piece of wax paper. Lightly dip the round end of the dauber into acrylic or chalk paint, then offload excess paint onto scrap paper or a paper towel – this is key to preventing bleed-through. Hold your stencil firmly in place (painter’s tape helps!) and use a gentle up-and-down dabbing motion, not brushing or swirling. Build the colour in light layers instead of applying heavy paint all at once. Carefully lift the stencil straight up while the paint is still slightly wet, and let your design dry completely before sealing, if necessary. See our blogs for other stencilling projects and instructions.
- Card making; Scrapbooking; Detail patterns
🟡 Sponge Stamper Sets (Set of 3)
Amazing for:
- Kids’ art projects
- Shape stamping
- Pattern repetition
YouTube Video: Sponge Applicators to use with Clear Stamps and Stencils and Ink
Basic Supplies You’ll Need
Here’s a handy checklist:
- Sponges (variety of sizes & shapes)
- Acrylic paint (multi-surface preferred)
- Chalk paint (for basecoats)
- Fabric paint (for clothing & totes)
- Place a piece of cardboard inside the t-shirt or bag to prevent the paint from going through to the back.
- Paper plates or paint trays
- Painter’s tape
- Stencils
- Aprons or old shirts
- Water cup & paper towels
- Protective table covering
- Heat-setting iron and parchment paper (for fabric projects)
- See our other blogs on t-shirt and other fabric painting for more detailed instructions on heat-setting.
How to Use Sponges for Crafting (Step-by-Step)
- 1️⃣ Don’t Soak the Sponge
Lightly dampen it – not dripping wet. This helps paint apply smoothly.
- 2️⃣ Dab, Don’t Drag
Press gently up and down. Dragging causes smears.
- 3️⃣ Use Light Layers
Build colour slowly to avoid blobs.
- 4️⃣ Offload First
Tap excess paint onto scrap paper before applying to your project.
- 5️⃣ Clean Between Colours
Rinse thoroughly and squeeze dry to avoid muddy colours.
DIY Sponge Crafts and Ideas
🎨 Canvas Art
- Ombre backgrounds
- Sponge galaxy painting
- Sunset skies
- Forest silhouettes
- Rainbow blending
- Sponge-stamped mandalas
🖼 Wood Signs
- Chalk paint base + acrylic sponge texture
- Use stencils in conjunction with the sponge painting
- Seal your artwork with a clear topcoat!
👕 Sponge painting on fabric – T-Shirts & other Fabric such as Totes and on Canvas Pencil Cases/Cosmetic Bags
- Polka dot shirts
- Sponge-stamped shapes
- Tie-dye effect (using round daubers)
- Stencilled tote bags
- Canvas pencil cases
- Hand-painted canvas pouches, pencil cases or cosmetic bags
- Heat set after drying.
- Place some parchment paper between the project and iron to protect both.
📦 Wood Jewellery Boxes
- Marble sponge finish – use a marble design stencil
- Floral patterns with sponges cut into flower shapes
- Ombre blending
- Stenciled lids
🛍 Handbags & Totes
- Use fabric paint for:
- Leopard print
- Polka dots
- Monograms
- Abstract art
🎁 Gift Wrap & Paper
- Custom wrapping paper
- Handmade greeting cards
- Scrapbooking accents
- Party decorations
- Envelope liners
🧂 Glass Mason Jars & Vases
- Basecoat with chalk paint using sponge brush
- Let dry
- Sponge acrylic paint lightly for texture
- Seal if desired
- Creates:
- Frosted finishes
- Vintage looks
- Beachy textures
🧱 Ceramic Tiles or vases – Decorative
- Coasters
- Decorative art tiles
- Mosaic patterns – use a mosaic stencil
- Use multi-surface acrylic paint and seal well.
- When using ceramic paints, be sure to follow the instructions on the bottles.
https://www.tiktok.com/@emilyhettart/video/7580799871909629206?is_from_webapp=1&sender_device=pc
More Creative Ideas!
- Sponge printed bookmarks
- Sponge-painted rocks
- Garden stepping stones
- DIY wall art panels
- Stencilled storage bins
- Art journals
- Memory box decorating
- Painted flower pots
- Easter egg sponge painting
Fun Projects for Kids
🌈 Sponge Rainbow Art Use round daubers in rainbow order.
☁ Sponge Cloud Painting Faux sponge on blue canvas
🐾 Animal Print Projects Cut sponge into paw shapes.
🍂 Fall Leaf Stamping Use real leaves + sponge blending.
🎆 Fireworks Art
- Small round daubers in bursts.
Tips for Success
- Use painter’s tape for clean edges.
- Work in layers.
- Let each layer dry.
- Store sponges clean and dry.
- Trim worn edges to extend life.
Conclusion:
- Sponges are one of the most underrated craft tools. They’re easy for little hands, forgiving for beginners, and versatile enough for serious DIYers.
Discover a world of creativity in our Craft Store, where you’ll find a variety of unique stencils and other fun craft accessories to inspire your next project. If you’re looking for more DIY inspiration, be sure to browse through our other blog posts as well – you might discover even more creative projects you’d love to try.
Happy Crafting!